This article originally appeared on the Springs "You're Home Blog."
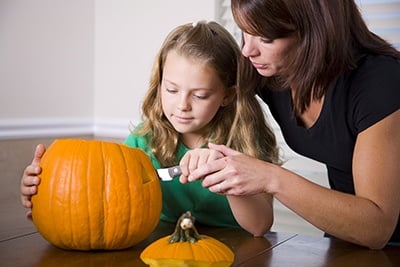
Halloween would feel incomplete without a festively spooky jack-o-lantern sitting watch on the balcony or patio of your Springs Apartments home. Whether you're planning a contest entry or a home decoration, use these tips and tricks to carve your pumpkin like a pro.
Prep Work
- Choose a pumpkin the same way you would select any produce, by looking for one that's bruise- and mold-free. A sturdy stem is a good sign, but avoid lifting the pumpkin by the stem to reduce the risk of damage. Flat bottoms are preferable so the pumpkin will not roll around. Beware of a heavy pumpkin that makes sloshing sounds; that's a good indicator that the pumpkin is rotten inside.
- Wash the pumpkin with warm, soapy water and dry thoroughly to inhibit the growth of mold.
- Designs can be created freestyle or by using templates. Either way, use a dry-erase marker so lines are easy to change or remove.
The Main Event
- Cutting into the bottom instead of the top helps the pumpkin retain moisture so it doesn't dry out quickly. Carve out a pumpkin-shaped piece for easier replacement.
- Use a large metal spoon or ice cream scoop to remove the guts. Instead of going one scoop at a time, scrape the inner wall in a continuous spiral motion and turn the pumpkin upside-down to release all the innards at once.
- Carve the pumpkin with a steady sawing motion using straight up-and-down strokes rather than angled ones. Use a long serrated knife such as a bread knife, or you can find inexpensive pumpkin carving sets on Amazon.com.
- Begin with the details in the center and work outwards to the larger pieces of carving to avoid breakage.
- If you prefer an all-over design to a single character, cookie cutters make good templates. Use a mallet to work the cutters into the pumpkin for a die-cut effect.
- Periodically test your carving by dimming the lights and shining a flashlight into the pumpkin. This shows areas that need better definition.
- Insert a lit candle for a few moments and carve out a small hole around the scorched area to create a "chimney." A safer choice is to use LEDs, battery-operated tea lights, or one of the other candle-free options in the market today.
Care and Feeding
- Apply petroleum jelly or vegetable oil on all the cut edges to keep them from drying out.
- Extend the life of the pumpkin by spraying it daily with a mixture of bleach and water.
- If you're not putting the pumpkin out right away, preserve it by wrapping in plastic and storing in the refrigerator.
- A dash of cinnamon or nutmeg inside makes for a delectable aroma when a candle is burning.
- If the pumpkin begins to shrivel despite your best efforts, soak it face-down in cold water for several hours to revive it.
When it comes to jack-o-lanterns, do you have a favorite theme or character? Tell us in the comments!


Your Pets